Pressing On.

I managed to get a few small jobs done and those took a whole Sunday. I know I had a lunch appointment and some chums dropped round for tea but, where do the hours go?

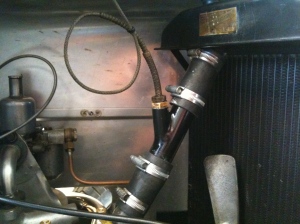
Water temp probe housing

The first job was the water temperature probe housing. There’s provision for an electric sender unit in the radiator but Learned Counsel gave me an analogue gauge that’s more suited to the style of the car. The only problem was where and how to place the probe. I quickly discovered that there wasn’t enough room in the thermostat housing (I’d originally planned to drill and tap for the BSP fitting) so the only other place was in-line with the inlet to the radiator. The brass tube I had spare from another engine provided the main body and the fitting was brazed to a handy piece of steel tube that was exactly the right size; the 2 parts were then brazed together. It’s not the tidiest job in the world – it was jolly difficult to get at the top of the joint with the TIG torch – but it’s water-tight and much the same as I made for the Austin.

Austin Temp Probe

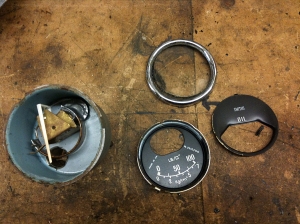
I’d been looking around for a suitable oil pressure gauge but they’ve either been too expensive or the wrong size so in the end I gave up the search and took a modern Smiths gauge (the type that nobody wants) to pieces,

Oil gauge

and re-worked the whole thing with new artwork (a bit of license here),

Cooper Stewart Oil

and some bits and pieces from the come-in-handy draw.

Oil gauge

I’ll  nickel plate the bezel and it’ll look fine.

OIl gauge

The fact that the needle doesn’t quite sit at zero was a bit of a miscalculation on my part but as long as the needle goes to more or less the same spot every time, I know I’ve got an engine that’s working. A quick lick of paint on the rev counter bezel to match it up with the speedo,

Rev Counter

and the day was gone.

I continue to think about The Monaco Dash and I still can’t see the point of going to Monaco. In my imagination, a Monte Carlo or Bust caper was very much on the menu but since my visit, Monaco and Monte Carlo have rather taken the shine off the idea. Granted that the fun would be in the journey – I’m sure that there’d be adventures to report that would take up several dinners but the destination still needs to have some significance. I gather from friends that in the late 60’s and early 70’s Monaco was worth the effort to get to – I don’t think that’s the case anymore.

Most people I’ve spoken to have much the same opinion about the place as I do. Good, that’s comforting; I was beginning to think that I might be a miserable old so-and-so who’d taken against a perfectly nice place on the basis of there being nowhere to park.

Perish the thought…

Déviation.

I’m sorry to say that I came away from Monaco with mixed feelings and thinking that I wouldn’t care to visit again. Cook was in agreeance. This presents a problem as far as The Monaco Dash is concerned but I feel that there’s a case to be made for an alternative and frankly, more interesting destination. There was something pitiable and soulless about Monaco itself that made our proposed adventure seem a bit pointless. The drive down would be a wonderful experience but there really needs to be something at the end of the rainbow – so to speak.

Menton was a joy in comparison.

Menton

The research part of our visit went extremely well. Within 5 minutes of our landing, Cook had struck up a conversation with a lady who turned out to have a family house to rent near St Paul de Vence; it had room for 12 or more and ample secure parking. We visited the house the next day and found it to be perfect – the owners charming and most obliging. We also sought out hotels and apartments in various locations in the area surrounding Monaco but none had quite the pull (or the space for parking) of our first find.

We had supper with a friend who lives in the Winter Palace in Menton and the following day went up into the mountains to introduce ourselves to friends of The Great Collector – a journey my Hillman would have had difficulty with just getting round the corners. We trundled back down the other side of the col into Italy on the way home.  A day was spent in Nice – the highlight of our trip – and then we got on the plane for home.

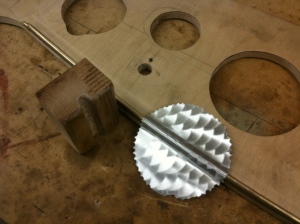
Whilst I mulled over my thoughts vis-a-vis an alternative to Monaco, I finished off the dashboard. I’d decided that the top and bottom of the dash needed to be a bit more than just a straight edge so before I went to France I’d glued a brass rod to the bottom curve and experimented in making a swage line with the bits I’d cut out that made the holes.

Swage line tools

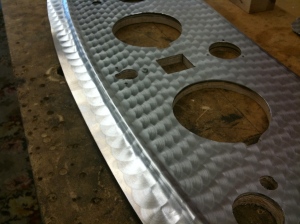
I discovered that the only way to get it right was to be confident and give the beech dolly a jolly good whack so that the swage line was formed in one hit – if possible.

Swage Line

Then I cut off most of the surplus and tapped it round and under the bottom edge of the panel to finish.

Swage line complete

From an aesthetic point of view it was definitely worth the risk; luckily it’s turned out alright and looks like a proper production job. So just the top of the dash to swage and trim and…
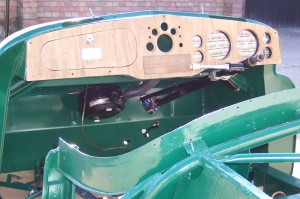
Dashboard

c’est fini.

The alternatives to Monaco? Two candidates spring immediately to mind; Pau and Angoulême. The Grand Prix de Pau Historique is usually about the 2nd week in May. I’ve been to Pau many times, though never for the GP, and find it delightful. The plus to this destination is that accommodation is not a problem; the hotel where I take up my duties as plongeur sleeps 12, is about an hour away and is in idyllic surroundings.

Pau

The Circuit des Ramparts in Angoulême is about the 3rd week of September which more or less coincides with the Monaco plan and again, accommodation for 12 is not a problem as I have friends with a complex of charming gites only 40 minutes away.

Angouleme

So maybe there’s a way round this.

Hello?….. No, Sorry Darling….

.. I’m in Monaco.

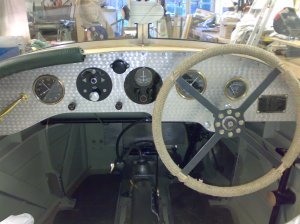
But before I left I was able to get the panel cut-outs done.

Panel

The layout is more or less what I planned and there’s a couple of controls yet to be installed; the engine stop and the exhaust lever (I’m still in two minds on that one). The indicators and the hand throttle will be the two controls attached to the steering column. It’s quite a busy panel and there’s still room for additions if I find I need them. A more practical problem came up in conversation the other day – what to do about windscreen wipers. I’ve got a couple of Lucas vacuum wiper motors…

Vacuum wiper motor

(his ‘n’ hers). These I prefer to the electric motors that hang from the top of the frame and which are so unsightly and likely to give you a headache if you hit one. Both solutions are not without drawbacks. My interpretation of the law is that if you can see over or around the windscreen from the driving position, wipers are not required (my A7 Special for instance). That’s fine if the car has no hood but with a hood, wipers are a must. Actually, in my experience, driving and flying in open cockpit stuff in the rain doesn’t pose a problem at all, in fact I’ve often been drier out in the open than when in an enclosed cockpit or with a hood up. Anyway, the jury’s out on the wipers for the moment – I may do something a bit less obtrusive, perhaps with the mechanism coming up from the scuttle.

Clock

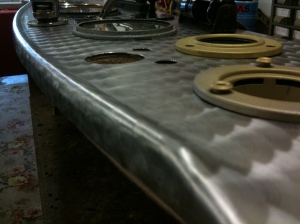
I then went ahead and cut the first hole in the aluminium. The pattern looks all over the place when viewed at an oblique angle but head on, it’s fine (I’m not doing it again – yet). I screwed the aluminium panel to the ply and drilled through from the back. I do miss Abrafiles; they made jobs like this a piece of cake. I’ll have to try to find something similar. I’ve got a set of ‘drill saws’, but they don’t really cut the mustard and it’s quicker to whip round the circumference with an ordinary drill, then needle file through the joins and tidy up with a half-round.

Panel

I’ve come to Monaco with Cook to see what there is in the way of digs for The Monaco Dash. The plan is to announce four days in advance that dinner is served on such-and-such a day at such-and-such a place and we all jump in our cars and belt off and the last one at table’s a cissy. There’s quite a mix of cars on the jolly including a Ferrari, an MGB, a Bentley, the Jowett, an MGA, a Lancia, my Hillman, and a Riley plus one other. It’s the sort of thing that you have to do just once in your life, even if you’re on short commons for the next 12 months. The worst part of the trip will be the flog down to Dover though I understand that Learned Counsel’s already looking forward to a slap-up in the ship’s greasy spoon. That’s a bit over-confident in my view….

Hello?…… No darling, I’m in a lay-by near Ashford.

That’s Good….

I’ve finished the front brakes; well, I haven’t put the reservoir on because that needs the firewall but all the lines are in and secure.

Front brake lines

I’ve put the springy bit between the 3-way junction block and the brake master cylinder because there’s a tiny bit of flex in the pedal bracket; it’s almost imperceptible but it’s there and over time could be the source of  problems. At the front of the engine, the brake pipes run from the radiator mount to the chassis rail, crossing the path that might be taken by a broken fan belt so I’ll have to make up a shield to protect the pipes from that eventuality. There’s a couple of handy bolts in the vicinity so it’s not an onerous task.

I popped into the sheet metal works earlier in the week – the pattern for my fuel tank is still sitting there waiting for them to roll a new cylinder for me so I can’t get on with that for the minute. Meanwhile I’ve started to tackle the instruments.

Rev counter

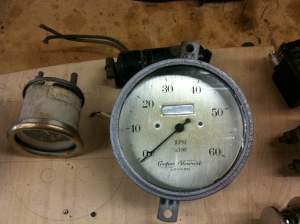
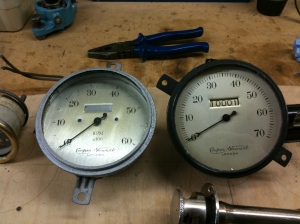
The works of the Rover rev counter slipped very neatly into the old Cooper Stewart speedo body. I had to cut a few holes in the back for the connections and then blank off the odometer hole in the face (I haven’t tidied that up yet). The biggest palaver was measuring the angles for the figures and doing the face on Photoshop. In order to match the speedo….

Speedo and rev counter

as closely as possible, I lightly rubbed off the old numbers, printed the new face on acetate and glued it on. It looks fine; not new but with a bit of age to it. Encouraged by this success, I tackled the clock. That was a jolly sight more difficult than the rev counter.

Clock

You’ll recall I bought a cheap clock in Morrisons the other week with a view to ripping it apart and using the motor for the car clock. I couldn’t use the original hands because the bore of each of the spindles was too big so I’ve had to file down the plastic hands to some sort of shape. They’ll pass muster but they’re a bit lumpen at the moment. The worst part was thinking out how to fix the mechanism to the body so that it was easily detachable for changing the battery. A bit of wood, a machine screw and some Araldite has done the job and, despite my attentions, the clock still works.

Panel

Then I started to cut holes in the panel. This was always going to be the tricky bit as it involves measuring – not my best suit – and so far I’ve managed to get the mag switches not quite in the middle. So that’s the primer, the ignition and fuel pump switch (I haven’t got mags) and the starter button. The speedo and the rev counter bodies are going to be a bit tricky to get in because the brackets that secure the body to the panel are welded on and have a much bigger circumference than the ‘ole. I’ll have to think that one out….. aha!, got it! The inspection panels on the Jodel had tabs like these instrument bodies and there was a square cut-out at a tangent to the circumference into which the tab was introduced, then the panel was rotated to lock.

Another snag overcome. That’s good.

If At First…..

… you don’t succeed, it usually gets worse.

Two or three things haven’t gone right in the last couple of weeks. Firstly, the sewing machine had to be returned to the supplier as it didn’t quite cut the mustard and secondly, I bought an on-line manual for my everyday car in the belief that I would be able to open the files, see what to do and get on with the job.

Ha-blinkin’-ha, I couldn’t have been more wronger than that!

For a start I needed first to unzip a load of .rar files. I downloaded Winrar and 5 hours later I had 10GB of .vm files for which another programme was needed that created a virtual machine within my computer to read those files. At the end of all that palaver I still couldn’t open anything. Is the average mechanic conversant with all this nonsense? What’s wrong with a .pdf – a simple format that everyone’s familiar with? I’ve asked the supplier why it has to be so difficult and that really, I just want to get on and mend the blinkin’ car, not spend the day shouting at my computer!

The next job that didn’t go quite as planned was the brake pipes. I made up the 2 short ones for the front hubs and installed the flexible hoses to points on the chassis from where the lines could hook up with the brake cylinder.

Front brake

I felt that something wasn’t quite right (I’d borrowed a flaring tool without instructions) but continued and completed all but one of the lines. It wasn’t until I was in the spares shop and chap mentioned a ‘double flare’ that the penny dropped. I’ve never done brake pipes before and wasn’t sure how the flare that I’d been making would marry up with the flexible hose ends – they appeared to need saucer-shaped flares rather than a doughnut shape. It turned out that I was missing out a secondary process to make the flare ‘female’ where necessary. So I’ve junked the first lot and started again (luckily, I bought 2 reels of pipe).

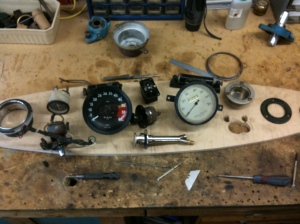
I’ve set about the dashboard and have gathered together most of the instruments on the bench. The Cooper-Stewart speedo had to be cobbled together using parts from 2 others and the spare case will house the Rover rev-counter (with a new face).

Instruments

I’ve got most of the artwork for the new faces and have only an oil pressure gauge to secure. I think the Morris Six runs with about 60lbs of pressure so an early gauge is no good. The water temperature probe won’t go into the radiator as the boss will accept only a modern type (my miscalculation) so I’ve found another thermostat housing and I’m going to drill and tap that for a suitable fitting. For the board itself, I’ll do the holes in the plywood first and then overlay the engine-turned aluminium to mark out where to cut. It’s not difficult, it’s just a bit nerve-wracking as getting it wrong means another evening making up a replacement turned sheet.

And lastly, to finish on a high note, the Jowett Juniper emerged and I rattled off a few shots…

Jowett Jupiter

…and the other side.

Jowett Jupiter

The front,

Jowett Jupiter

and the dashboard.

Jowett Jupiter

Good innit.

The End Of The Beginning….

… is in sight.

The beginning being the mechanics of the thing; engine, brakes, steering, suspension etc; everything you need to drive the car except the bit that keeps the rain off. I still have the fuel tank to make, the brakes to hook up, the friction dampers to mount, some plumbing and electrics, the exhaust but, I’m now not that far off the first roar round the yard.

Front brake pipe

The solution to the offside brake hose snag – it was always going to interfere with the drag link – was to make up a solid pipe and bracket to put the connection over the top of the kingpin. This takes the hose well out of the way and also reduces the movement and potential strain on the hose and fittings on full lock. I’ve made the nearside pipe to match. The other ends of the hoses will hook up to brackets on the chassis – yet to be made. I’ll get the hoses first.

Engine turning

I’ve dusted off the ‘engine turning’ machine and completed the blank for the dashboard. There’s something approaching 1600 ‘turns’ on the panel and I was a bit goggle-eyed at the end of the exercise but it had to be done. You can see that, despite my every effort to be as accurate as possible, the pattern does wander slightly. The vertical increments are set by the peg board but the horizontal spacing has to be eye-balled – hence the shift. Still, once the holes for instruments, switches and so forth are cut, there’s plenty to take the eye away from any irregularities. The Austin panel is a bit wobbly but it’s not obvious unless you look for it.

Austin dash

A bit of good news is that the front brake flexible hoses, calculated to be about 16″ long, are off-the-shelf Series 3 Land Rover front hoses. It’s always a bit of an uphill struggle when looking for compatible parts; I know Learned Counsel has spent ages trawling the net for Jowett stuff and cross-referencing with for instance, Ford parts. Jowett parts always attract a premium for the name and the same stuff goes on cars like the old Consul but is obtainable, happily, at a third of the price.

I’ve welded up the new silencer; that exercise wasn’t without trauma. I wasn’t paying attention when welding up the first end-cap and blew a hole in it. Trying to fill it just made it worse until I gave up and had a go on the other end-cap. By then, Learned Counsel had popped his head round the door to see what all the noise was about and pointed out where I was going wrong. I followed his advice – tack the rim more closely – and all went well. The duff end-cap I just turned over, re-welded it to the body of the silencer and trimmed to fit.

Silencer

One of the end-caps is detachable so that I can add or remove wadding. The cap is secured by 3 stainless steel bolts with the nuts welded to the inside of the body. Well, the first nut went on smoothly, then the 2nd and 3rd nuts decided to melt together with the bolts that held them in place. So 2 seconds welding and half an hour drilling each of the bolts out. I kept very calm and re-cut the threads with a tap.

All’s well that ends well.

4 Hours Later…

.. the simple process of attaching the new plate to the pinion carrier, was still work in progress. The holes for the 6 bolts were just a swire too big – no good for a propshaft – so I turned up a couple of over-sized pins, pressed them into the new plate and took a shave out of the holes in the carrier end to accommodate them.

Pins

The plate didn’t quite go all the way home so an encouraging tap was administered. This knocked the end float in the carrier out of kilter (indicating that I hadn’t got the assembly and adjustment sequence quite right so it was just as well) and, in taking it all apart to reset it, the tab washer broke and I’m blowed if I can be bothered to make another one. Maybe I could salvage one from a spare carrier? No, they’re all seized solid. So I’ll have to drill and wire-lock.

Wrong

And in drilling for the wire-locking I went ahead without thinking and put the holes on the wrong side of the flat; they should be on this side…

Right

… because the two surfaces abut and would crush the wire or not tighten up properly. What a blinkin’ circus! Here’s the finished job..

Wire-locking

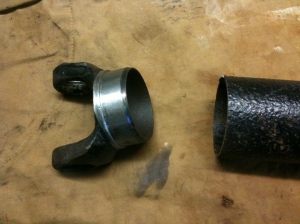
Next stop, the propshaft itself. I trimmed the old Morris Six one to size by taking a good 18″ out and then removed the yoke from the surplus to re-weld in the shortened end. I was able to tidy it up in the lathe and preserve the original flange for centring.

Propshaft yoke

Then the UJ’s… every cap went on perfectly except the last (and the flying circlip will turn up in 3 years time) but I was quite pleased and decided I must be getting the hang of it; 1 in 8 is pretty good. And then I set about the tank. The sump had a few holes in it and one of the rims was perforated but the rest seemed serviceable. Well, the sump would have to come off for the repairs and that would give me the chance to have a proper look inside.

Fuel tank sump

I didn’t much like what I saw so, after a brief tech meeting with Learned Counsel, the upshot was that it would be quicker and easier to roll a new tank and whack in the baffles and end plates from the old one and with the aid of my flame thrower (the tank hasn’t had petrol in it for 70+ years but I still had one eye on the door) I took the lot to bits and now have a kit of parts for the new tank.

Kit of parts

I’m going to do away with the sump and just install a drain plug – I know it’s not quite like it was but it’s a lot of fuss shaping up a new sump and it’s just another thing to leak.

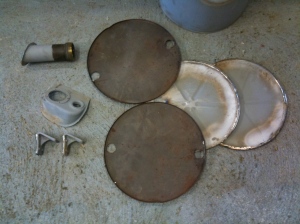
And finally, I addressed the silencer. After much thought, I’ve decided not to have a selectable exhaust system – noisy or quiet – because again, it’s just too much messing about and the only time I’d open it up to straight through would be to roar through the tunnel at Monte Carlo – I can always tweak the silencer to give it a sporting note at near full chat if I want to. So I’ve got another kit of parts – except the end plates which I haven’t got round to just yet – ready for welding.

Silencer parts

That turned out to be quite a long day.